
The most glaring of the cosmetic issues on the synth could only be seen from the back:
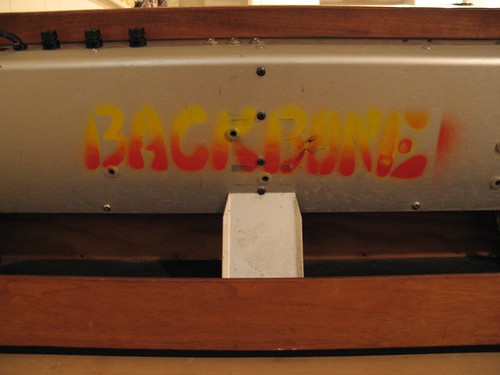 Apparently the original owner of the Minimoog was in a band called "Backbone". Evidently this individual decided that the best way to advertise the band's name was to spray paint a logo on the back panel of the synth. As you can see, it looks AWESOME. I can just imagine how excited the other members of Backbone must have been when they saw their badass logo on the Minimoog.
"Dude, that looks killer. You can't even tell that it's a home job - that's how pro it looks."
"Yeah, people are going to be asking how we managed to get Moog to make us a custom synth with our logo on it! How did you do that anyway? It's TWO colors!"
"Easy. I just used a stencil, and sprayed red on the bottom and yellow on the top. I got a little bit of red outside the stencil on the right, but no one will see that."
"It looks like the letters are coming out of a glorious sunset, reminding us of the glory of Backbone."
...and so on. Actually it did have a little humour value, but that faded quickly enough and I just wanted to get rid of the logo. It's also sprayed on to the bottom of the synth, but NO ONE sees that, and I'm going to replace the wood eventually anyway. So after I did a quick Google search to make sure Backbone wasn't some famous old rock band (I had visions of auctioning it off to a wealthy Backbone fan for thousands of dollars), I set out to remove the ugliness.
The first step was to remove the back panel. It's held on by about a dozen screws, and it was fairly easy to do. It gave me an opportunity to have a peek inside the Minimoog:
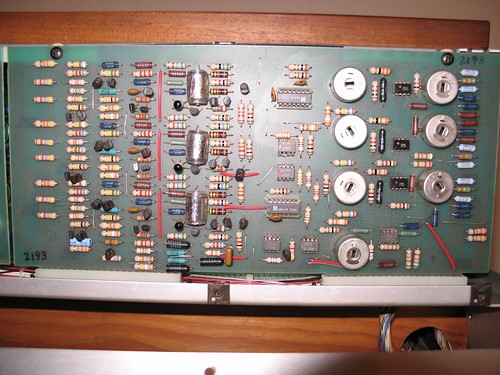 Clicking on the image will bring you to a bunch more shots. Here you can see the osc board. That's about as technical as I get with these things, is being able to identify this particular board.
Having removed the back panel, I removed the four machine screws designed to keep the Moog in its "upright" position, and I wiped off all the dust and grime. I had a few solvents that I was going to try for the job of removing the paint.
Before I began wiping chemicals all over the outer panel of the mini, I thought it might be a good idea to test them out by applying them in small hidden areas on the inside of the panel. I didn't want to end up with some chemical reaction that ruined the panel altogether. Fortunately there was nothing to worry about, and lacquer thinner turned out to be the solvent of choice.
 Using the "clean rag" method, I put solvent on a small clean area of my rag, and started wiping up the paint, which basically melted under the lacquer thinner. I worked on it a little bit at a time, using a clean part of the rag with each pass. It was more time consuming this way, but it made very little mess and the paint was cleaned off quite well.
I thought it would be prudent to use gloves while handling such potent chemicals, so I wore a pair made of polyurethane. They lasted about a minute before they started to melt. I guess lacquer thinner and poly gloves don't mix. Well, actually they do mix and that's the problem, if you want to get technical. Another thing I learned is that kitchen sponges which have a green scrubby material on one side shouldn't be used with solvents. Turns out the scrubby material is made of some kind of plastic that dissolves rather quickly. Also, water doesn't rinse lacquer thinner out of a rag. And don't sniff the rag to see if it still has lacquer thinner on it. Seriously.
The panel also had tiny areas that looked like rust, and I managed to get that off with a little CLR cleaner (which I also spot tested on the inside of the panel).
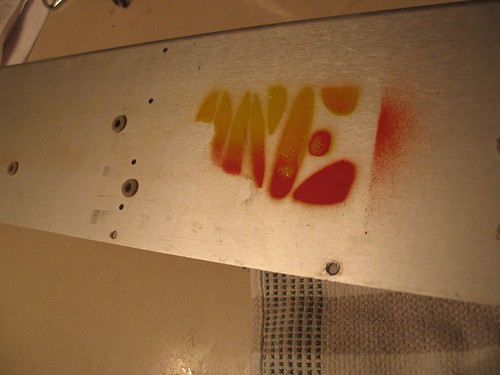
In the end the panel is nice and clean. If you look at it under bright light at a certain angle you can still see the shape of the Backbone logo. I tried scrubbing it out with steel wool, and it just wouldn't disappear. If anyone knows what might do the trick be sure to let me know. It's hardly noticeable though, and I'm quite happy with the result. Here it is:

No comments:
Post a Comment