
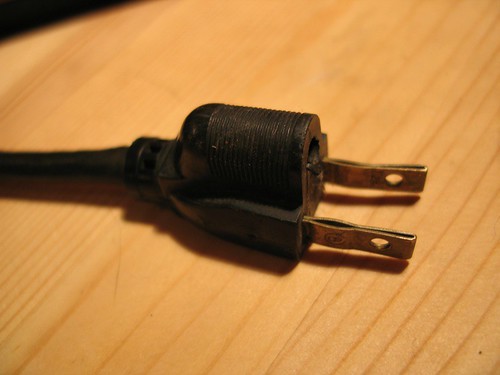
So I set my sights on one of the other minor issues I wanted to fix: the power cord. Obviously Backbone is a band that rocked pretty hard on stage, and nowhere was it more evident than the Minimoog's tattered power cord.
 |  |
Inside the synth, the power supply to the electronics is all on the left hand side, near where the power cord comes out. A couple of circuit boards block a clear view of the wiring, but fortunately the boards are connected via sockets, and easily removed. It looked like this:
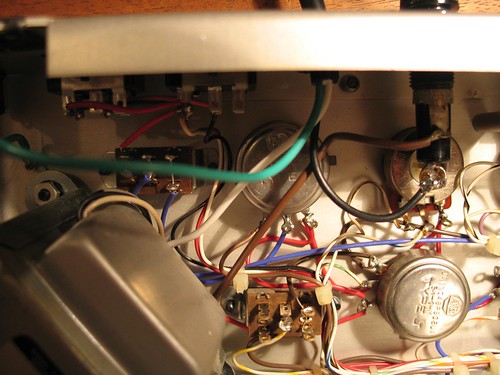 The power cord has three wires: black, white and green. The black wire (the "hot" wire) is connected to the bottom of a fuse holder on the right. The fuse holder is connected to a brown wire, which leads to the transformer (the silver box on the left). The white ("neutral") wire is connected to part of the power switch. The green wire (the ground) leads to one of the screws that hold the transformer in place. I made sure I didn't get any of that mixed up. I didn't want to fry the synth.
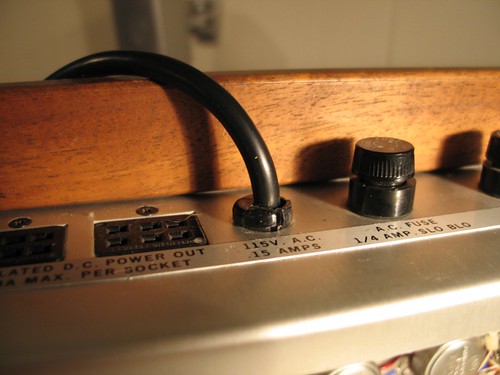
I used a 10' computer power cord (I had to lop off the female end) to replace the original one. The operation was actually pretty simple, and it afforded me the opportunity to use my soldering iron, which I haven't touched in a while. I love the smell of melted solder rosin. The above picture is of the completed operation, from the inside. Here's the outside:
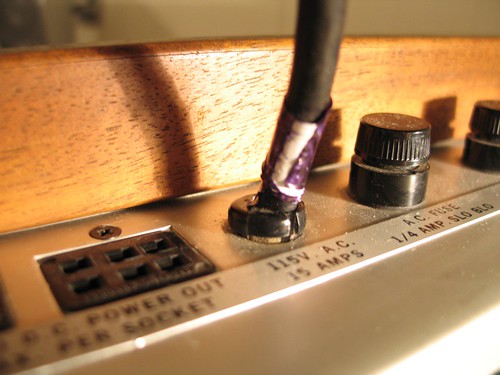
 Probably the biggest challenge (which I realize now is really simple) was figuring out how the strain relief came out. That's the black plastic bit that wraps around the cord as it comes out of the synth. In the end it just needed some perseverance with needle-nose pliers, squeezing from underneath. As you can see, the new cord fit snugly into the strain relief, and eventually it all got put into place.
1 comment:
I have enjoyed reading about your Minimoog project and it looks great!
Mine needs a new power cord and it is blowing fuses. Do you think the cord could be shorting and causing the fuses to blow?
I'm not sure if that would do it.
Post a Comment